Record, Share, and Post to Moodle
This short help guide will show you how to record a Zoom session, review two ways to share the recorded session, and how to post these recordings into Moodle.
Please see Getting Started with Zoom for guidance on how to log into Zoom and start your first meeting.
Note there are two types of Recordings - Record on this Computer, and Record to the Cloud. The Computer recording will create a video file you can download and share, whereas a Cloud recording will generate a link to share with others. Record to the cloud if you're going to share this with your students in Moodle. Record to your desktop if you need to edit the video.
Select your Instruction Set (Computer or Cloud):

Recording your Session
- Locate the black Control Bar on your screen. This bar will hide automatically - move your cursor 'Up', like you are dragging it through the top of the screen, to see all options.
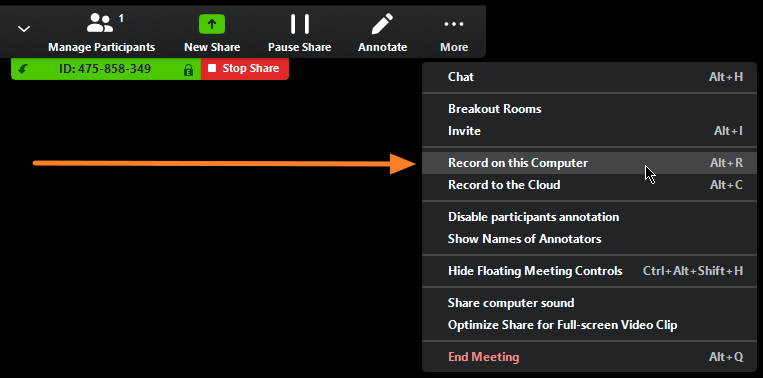
- In the Control Bar, hover your mouse over 'More', and click 'Record on this Computer' to begin recording.
- Recording to your computer will generate a local video file after completion.
- Recording in progress is indicated by a small red dot with a black circle outline around it (Computer), located next to your meeting ID and below the Control Bar.
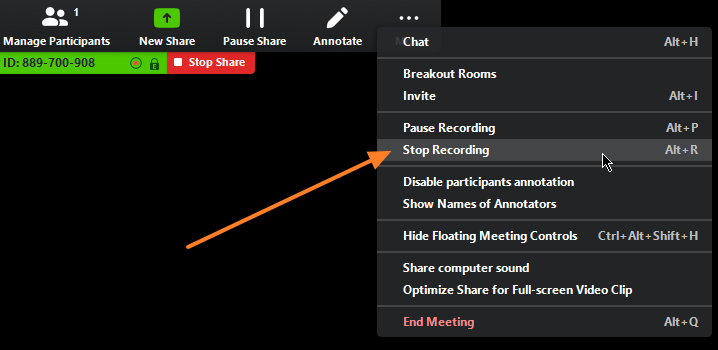
- The recording can be paused or stopped by navigating into the Control Bar, hovering over More, and clicking on Stop Recording.

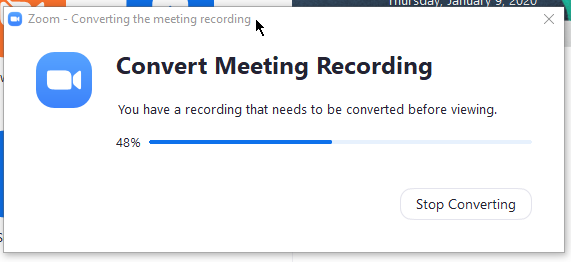
- Computer recordings will process immediately after the meeting ends. The processing screen can be seen in the first image on the right.
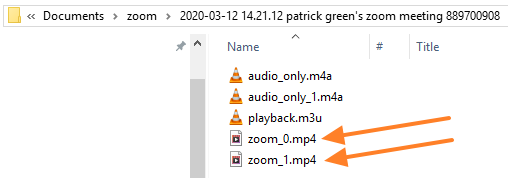
- Once the computer recording is processed, the file containing the recording will be opened. The recording file to be shared is named zoom_0.mp4.
- If multiple recordings were created, they will be named in order, counting up from 0.
Posting a Computer Recording to Moodle
- First, locate the video file according to the supporting image to the right. Recordings are separated by folders with their date and time.
- The file to post to Moodle is called Zoom_0.mp4.
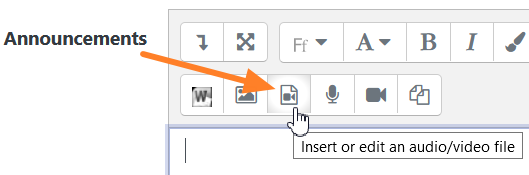
- Next, decide where you want the recording to go. For this example, we will place it in an Annoucement Block, Discussion Board, or at the top of a Weekly Module.
- Click the 'Insert or edit an audio/video file' button pictured.
- Next, Click the Video tab at the top, then click 'browse repositories...' for our recording file.
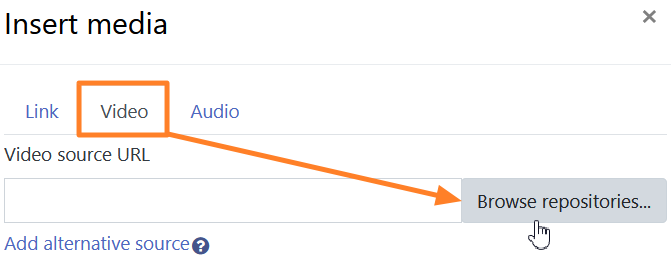
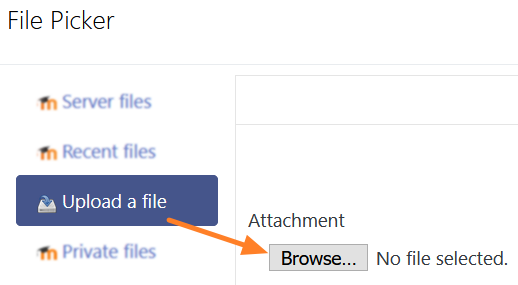
- Now in the file picker, click 'Browse...' and upload the 'Zoom_0.mp4' file we located above.
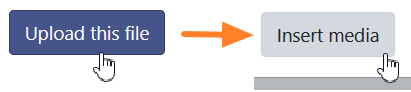
- Finally, press Upload this file, then Insert media to complete the upload and insert. You should see a black box of your video in the Moodle editor.
- Be sure to 'Save changes' in your Annoucement, Discussion Board, or Weekly Module and you have successfully posted a Zoom Computer recording to Moodle!

Recording your Session *Note: Cloud Recordings are deleted after 120 days
- Locate the black Control Bar on your screen. This bar will hide automatically - move your cursor 'Up', like you are dragging it through the top of the screen, to see all options.
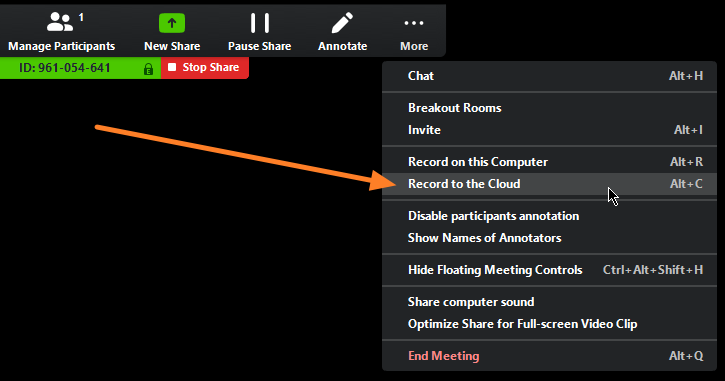
- In the Control Bar, hover your mouse over 'More', and click 'Record to the Cloud', to begin recording.
- Recording to the Cloud will save the video in the Cloud and e-mail you a link to watch once finished.
- Recording in progress is indicated by a small red dot with a black cloud outline around it (Cloud), located next to your meeting ID and below the Control Bar.
- The recording can be paused or stopped by navigating into the Control Bar, hovering over More, and clicking on Stop Recording.

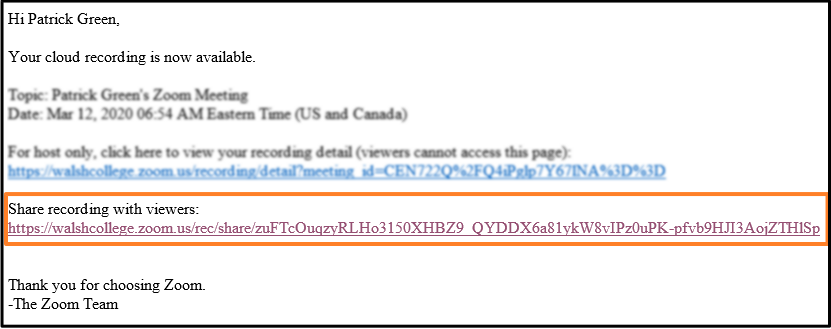
- Locate the email sent to your Inbox with your recording link. be sure to only post or share the second link, labelled "Share recording with viewers"
- If you do not see the email right away, Zoom is still processing your recording and will send an email once it is ready.
- This link can be emailed to students, or copied and pasted anywhere else a link would normally be present.
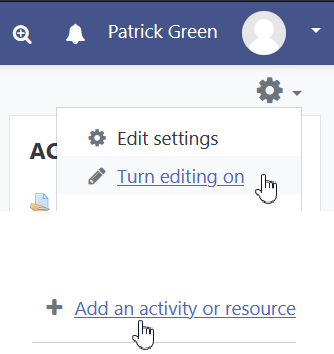
- If you would like to add this link as a standalone item alongside lectures in your course, first turn editing on.
- Next, navigate to the module you want to add the Zoom link to and click on 'Add an activity or resource' in the bottom right corner of the module.
- In the pop-up window, scroll to the very bottom and click 'URL'.
- Give your Recording a name and paste the 'Share' Zoom link from the email recieved into the 'External URL' box.
- Be sure to scroll down to the 'Appearance' section of settings and switch the Display from Embed to 'New Window'. This ensures students aren't completely taken away from Moodle when viewing the Recording.
- With those settings applied, press 'Save and Display' at the very bottom to publish the link to your course. Check the link to make sure it works as expected.
- You have successfully posted a Cloud Zoom recording to Moodle!

Get Help
For Faculty help with Zoom, please contact zoomtraining@walshcollege.edu.