Using the Annotation Tool to grade Assignments
The inline annotation tool is a utility in moodle that allows for grading assignments with comments and markings directly on a student's submissions. Below is a brief overview of the procedure, and user interface.
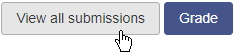
To begin, click on the assignment that needs grading. "View all submissions" will return your class roster to choose which student to grade in particular, while the blue "Grade" button will open the annotation tool on the first student (in alphabetical order).

The Interface

- These links will return you to the course, return you to the assignment, or edit the assignment settings (gear icon).
- This link will take you to that student's profile page.
- The drop down menu allows you to choose an individual student for selection, while the blue arrows to each side of the drop down menu let you move to the previous or next student. the filter icon lets you refine the assignment based on submission or grading status.
- The Grading panel allows you to enter a grade, add feedback that will appear in the gradebook, score rubrics, and upload additional feedback files. you can also access the Turnitin originality report here, if enabled.
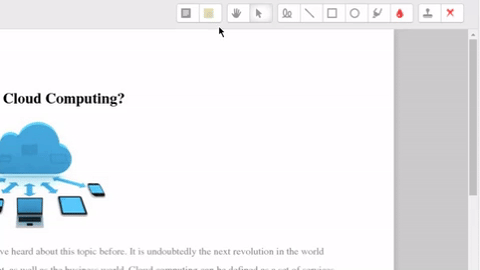
- Annotation Tools are used to mark up the assignment in the review panel, where the document is seen.
- Toggle Switches allow you to change your focus, or what is present on the screen at one time. The leftmost switch collapses the review panel, the middle switch returns you to the default view (as shown above), and the rightmost switch collapses the grading panel.
- The "Save changes" button saves your work and leaves you viewing the same student - "Save and Next" will save changes and advance you to the next student in the roster. The "Reset" button will clear only clear grading feedback (and not annotations) for that individual student. Check the "Notify students" box to alert them that the assignment has been graded - The box will automatically remain checked after being checked once for additional submissions.
The Annotation Tools

There are three main types of marking tools -
- Comments (Sticky note) - Select the comment icon (left), and then select a background color (right). Click and drag to draw a shape that will hold the commentary - the box may not be resized once created, however the box will automatically adjust to the size of your text. The marking tool also features a notes menu in the upper right corner of the comment box, which allows you to save this comment to a quicklist instead of typing the same response multiple times. You may also delete the comment through the same menu.
If you would like to move the comment block, click the cursor pointer icon located next to the marking tools, then click and drag your comment. - Drawing Tools - To begin using the drawing tools, select a desired color first using the rain drop icon, and then click which shape you like to utilize. For example, the line button is useful for underlining, or crossing out sections of text. Simply click and drag to form the line or shape. The highlighter is located next to the rain drop icon, and will highlight in the color selected.
Moving these drawn items is the same as comments - click the cursor pointer icon, then click and drag your item. To delete an drawing, click on the trash can icon that appears once the item is selected. - Stamps - To add a stamp to the assignment, first select which stamp you would like to use. A red 'X' is the default stamp - Click the red X to select from a dropdown list of which stamp to add. Once selected, click the stamp icon to the left of the selected stamp, and then click on the document for placement. Please note that the lower right corner of the cursor placement will be where the upper left corner of the stamp is to be placed.
As with the other tools, the cursor button may be used to move the position, or delete the stamp from the document.


Please note that the "Reset" button at the bottom of the page, located next to "Save changes", will not remove Annotations made to an assignment. The Reset button will only clear grading feedback in the Grading Panel.
Optionally you may check the box to notify students that their assignment has been graded. If the box is checked for one student, the box will remain checked for the next student(s) by default.
Once you are satisfied with your markings, make sure to press "Save changes" and verify that the "Current grade in gradebook" located in the Grading Panel was set correctly.
Students with an Asterisk* next to their email address in the dropdown menu indicates their assignment is submitted and still needs grading.